Free Download SpyHunter Repair Software

User Guide to Run SpyHunter Repair Software
The SpyHunter Repair Software designed in a very interactive fashion which gives you a user-friendly way to easily deal with any kind of threats. You just need to go through simple process of software installation and run the SpyHunter Repair Software. As soon as it is executed inside the infected system, it will start searching for the malicious threats and remove it spontaneously without affecting other running programs.
Step 1.)
Once Click On Download Button, SpyHunter Repair Software Automatically downloaded. After that Install SpyHunter Repair Software on your computer. It's hardly takes a few minutes to complete after which it will displays its interface on which you have to click on “Scan Computer” button. This scans your overall computer including system files, media drives, Windows registry, etc to search for any possible threats.

Step 2.)
In the next step, you will see the removal tool is scanning the drive and essential parts of Windows, under which you will also see the threats with its description.

Step 3.)
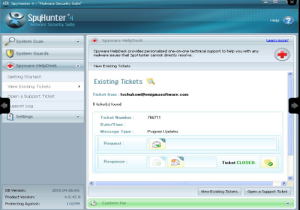
Additionally, the removal tool is also featured with “Spyware HelpDesk.” this feature provides you complete help and information regarding the spyware that are encountering in your system.
 Step 4.)
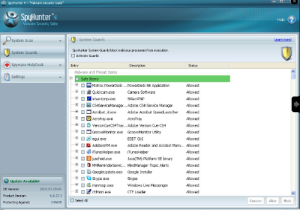
“System Guard” functionality features to provide a real time protection over the system that keeps scanning all files in background. Also it scans to detect suspicious activities to block it at the same moment.
Step 5.)
Once the program has completely installed, you can delete the setup file. To open your new program, click the "Start" button, select "Programs", and then click the SpyHunter icon.
Once Click On Download Button, SpyHunter Repair Software Automatically downloaded. After that Install SpyHunter Repair Software on your computer. It's hardly takes a few minutes to complete after which it will displays its interface on which you have to click on “Scan Computer” button. This scans your overall computer including system files, media drives, Windows registry, etc to search for any possible threats.
Step 2.)
In the next step, you will see the removal tool is scanning the drive and essential parts of Windows, under which you will also see the threats with its description.
Step 3.)
Additionally, the removal tool is also featured with “Spyware HelpDesk.” this feature provides you complete help and information regarding the spyware that are encountering in your system.
“System Guard” functionality features to provide a real time protection over the system that keeps scanning all files in background. Also it scans to detect suspicious activities to block it at the same moment.
Once the program has completely installed, you can delete the setup file. To open your new program, click the "Start" button, select "Programs", and then click the SpyHunter icon.